Editor Hugo Andreae gives his Karnic 2250 a new lease of life with a vinyl wrap, and feels as if he's got a brand new boat.
One of the reasons we bought our Karnic 2250 was that it doesn’t require much looking after, yet after six years of use and abuse by me and my extended family it was beginning to look a little tired around the edges. The plain white gel-coat had lost its lustre, the ‘go-faster’ stripes were beginning to peel off and some berthing ‘malfunctions’ had left a few battle scars on her once pristine topsides. It was nothing that couldn’t be sorted out with gel-coat filler, cutting compound, polish and a day or two of elbow grease, but ever since reading about the trend for vinyl wrapping I’ve been tempted to give it a go.
Not only would a vinyl wrap restore that new-boat sheen, but I would be able to change the colour as well without the expense or commitment of a permanent paint job. If I ever got bored of it or the colour started to fade, I could just peel it off again and revert to the original gel-coat. Unfortunately, applying the vinyl without leaving unsightly bubbles, ridges and cut outs is rather trickier. That’s where Grapefruit Graphics comes in.

The choice of colours when Vinyl wrapping your boat
With over 11 years experience in vinyl-wrapping craft, initially for major sponsored sailing events and more recently for privately owned leisure craft, the team knows a thing or two about doing it properly. A recent agreement with Mactac has also given them access to a huge range of different colours, textures and finishes of marine Tuning Film, from carbon fibre weaves to subtle metallics and, if you’re really brave, matt, iridescent or even velvet finishes.
I’m not quite brave enough to subject my family to any of those last three but I did want to go for something slightly more interesting than the usual dark blue or cream. After discussing the options with Andy Yeomans from Grapefruit Graphics and flicking through the samples he sent me, I settled on Gloss Silver Sublime as the main colour with metallic charcoal stripes.

The team use a hairdryer to remove the existing style lines
The vinyl wrap process
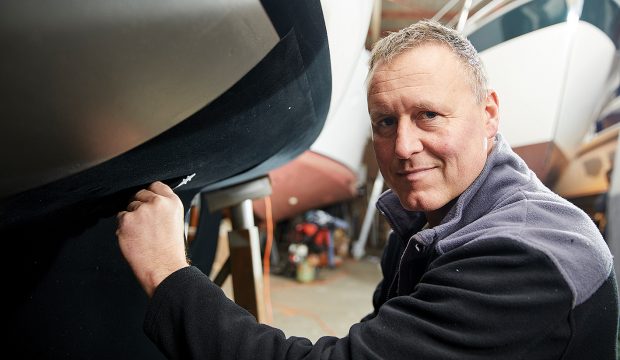
If I’d done my homework in advance I would have removed the existing styling lines, graphics and name badges before the Grapefruit team arrived to save on time and money, but this lack of prep did give me the chance to see how it should be done correctly. The trick is to use a bog standard hairdryer to warm the vinyl then lift a corner using a paint scraper before gently peeling the whole thing off, warming it as you go.
Any scratches, lumps or bumps should also be filled and fared as they will show through the vinyl, although you won’t need to spend hours trying to match the perfect shade of gel-coat as the colour won’t be visible. A final wash down with soapy water to rinse away salt or grime will leave it clean and ready for the team to give it a once over with panel wipe to remove any greasy residues before the application process begins.
The first step is to apply a very thin Kevlar cutting filament, a bit like a cheese wire, along the top and bottom edges of the topsides to delineate where the vinyl is due to start and finish. It’s not designed for use below the waterline so you need to decide whether it’s going to butt right up to the antifouling paint or stop a few inches short to leave a strip of white gel-coat or a painted boot-topping line between them. I opted to leave a couple of inches of exposed gel-coat between them so that I could overpaint it with antifouling if required.

The team apply the Vinyl proper
Once the cutting filament was in place the team started to apply the vinyl proper. It comes in 1.5m wide strips which are unravelled along the length of the hull and hung loosely from the rubbing strip. Then the backing strip is peeled off so that the adhesive surface could be pressed on to the gel-coat using a flexible plastic squeegee. The guys make it look easy but the speed and skill with which they smooth out every last ripple and air bubble is mesmerising to watch. Strategic use of a heat gun allows them to ‘relax’ the vinyl so that it stretches smoothly over the knuckle half way up the topsides as well as tucking it hard up against the rub rail.

Star-shaped cuts are made around details
Star-shaped cuts are made around the skin fittings before the overlapping vinyl is carefully cut away with a scalpel to leave a perfect join. Once all the awkward bits are done, the whole surface is given a final going over with the heat gun to take out any memory effect and to set it in position. The really pleasing moment is when the Kevlar cutting filament is peeled away, cutting off the excess vinyl top and bottom to leave a perfectly smooth edge.
The same process is repeated along the boat’s other flank with a 2in overlap at the bow where the two sides join. With a light coloured vinyl such as this you can just about see the join from a couple of feet away but you’d never spot it from any kind of distance and with darker colours it’s all but invisible. The vinyl is 85 microns thick, compared to around 40 microns for a coat of paint, so there’s barely an edge to see.
With the main colour done, all that remains is for the charcoal-coloured styling lines to be applied over the top to break up the big swathes of silver. I chose a 5cm band just above the waterline with two thinner ones just above the knuckle. These came in pre-aligned strips which are then applied by hand and adjusted by eye to take out any remaining wobbles. The end result is a revelation.
It really does look and feel like a brand new boat, while the silver finish somehow makes the whole shape look considerably classier and more expensive. It never was the most beautiful craft afloat but the silver colour shows off the curves of the hull much better than the white gel-coat and the contrast with the coachroof gives it leaner, more aggressive proportions.

Hugo opts for Gloss Silver Sublime as the main colour with metallic charcoal stripes
Costs and options for a vinyl boat wrap
At £1,500 for my 22-footer (a 43ft flybridge would be more like £5,500), it seems like money well spent and goes a long way to relieving that new-boat itch we all get from time to time. I managed to deceive a number of my fellow bertholders into thinking I’d bought a new boat, it really does look that different!

The two questions I’m always asked are, what happens if I scratch it and how long will it last? I’m hoping not to find out any time soon but I’m told that, like a painted surface, it will scratch if rubbed hard against a sharp object but I have been supplied with a small roll of spare vinyl to do my own repairs if needed. All you need to do is cut around the rough edges and apply a small patch over the top. It may not be perfect but only I am likely to notice it, and it’ll be a hell of a lot quicker, easier and cheaper than a professional gel-coat repair.
As for fading, it is prone to the same issues as other coatings, so dark colours and reds will fade quicker than lighter colours, particularly in direct Med sunlight, but Andy says I should get to enjoy a five- to eight-year lifespan in the UK, or a year or two less if I move it to the Med – in my dreams!
First published in Motor Boat & Yachting, issue August 2014.
Subscribe to the print version of MBY
Subscribe to a digital version of MBY