

Most DIY projects are a little rough around the edges, but when Jimmy Callow decided to build himself a new boat only the best would do
I’ve seen a few home-built boats in my time and while I’m in awe of anyone who manages to complete any project of this complexity, if you look closely the end result is often a little rough around the edges. That’s hardly surprising when you look at what goes into building a boat.
It requires so many different skills from designing to plumbing, to woodworking, to electrical and mechanical engineering, that it’s almost impossible for one person to do it all. Even if by some miracle you have the correct skills, you still only get one chance to do it rather than honing your skills over time on a production line.
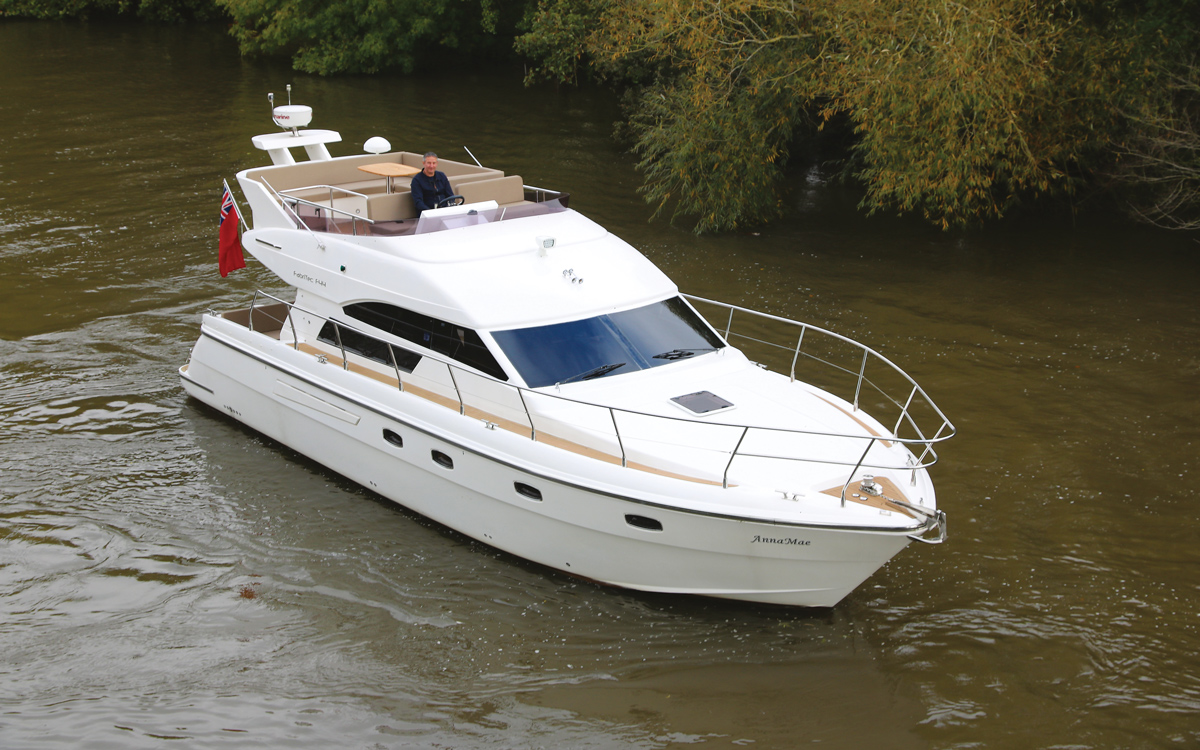
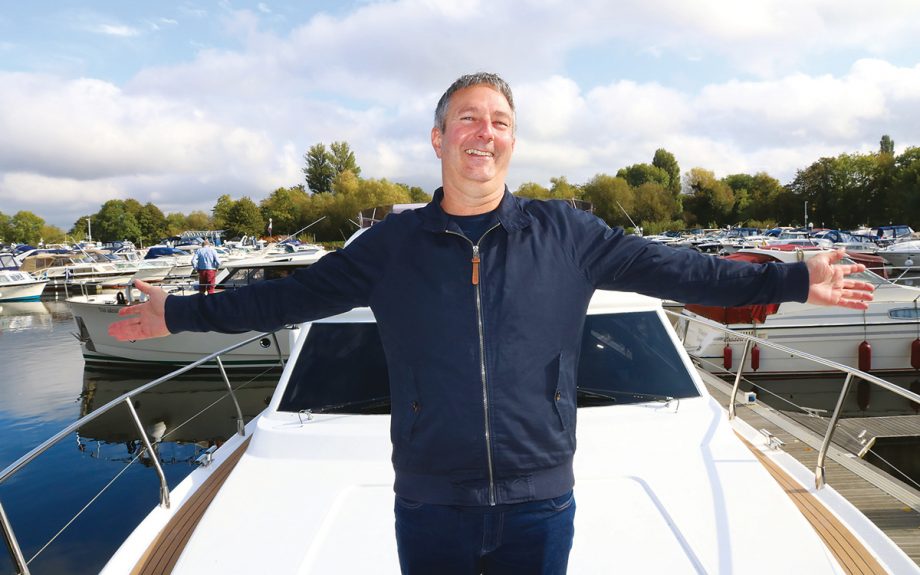
So when I heard that a chap called Jimmy Callow had built himself a 44ft flybridge boat from scratch, I envisaged some floating caravan with a basic interior knocked up in his back garden. Until I saw the photographs. It not only looked the part with a classy, contemporary exterior but it was powered by a pair of Volvo D6 engines and seemed to have an interior that could have come straight out of a Fairline or Princess. This needed further investigation.
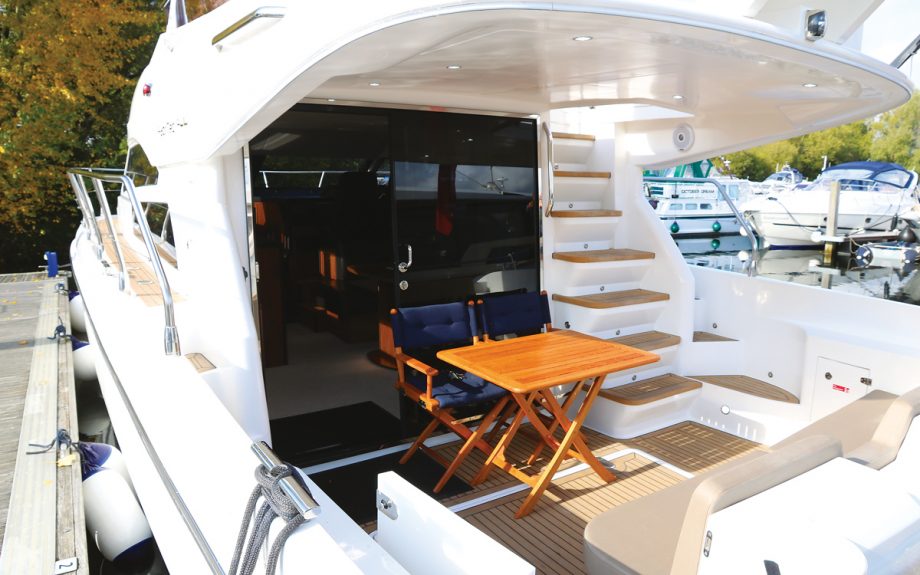
The galley surround is edged in a special soft-touch coating used on some Fairline models
Small beginnings
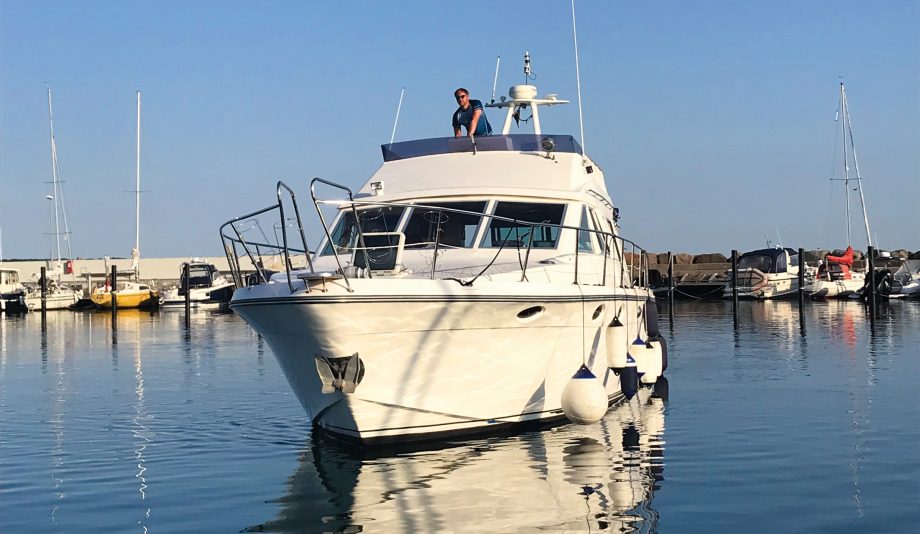
Fast forward a couple of weeks and I’m sitting with Jimmy on his boat in Bray marina near Windsor. The camera wasn’t lying. In the flesh it really does look like a modern production boat complete with LED lighting, bespoke touch-screen controls and top quality designer fittings.
It even has its own branding with the make and model name proudly emblazoned along the superstructure – Fabritec F44. If it were on display at a boat show you would quite naturally assume it had just rolled off a production line – and not a high-volume, low-price one either. It genuinely is that good. So how did he do it?
The story starts back in 1988 when Jimmy was 19. He and his father took an old rain-filled 18ft cuddy cruiser in part exchange for a kitchen they’d fitted. It was an inauspicious start but it gave Jimmy the boating bug as he pottered around the rivers and waterways of North Kent.
Article continues below…
DIY motor yacht restoration: 1980s Birchwood gets a new lease of life
One-off Riva Aquarama Lamborghini on the water after three-year restoration
Riva Aquarama Lamborghini is the fastest Aquarama ever built, capable of 48 knots
Before long he started yearning for something bigger that he could stay aboard but money was tight and buying even a good secondhand 30-footer was out of reach. Then in 1994 he stumbled across an unfinished Colvic Sunquest 34 flybridge that had been repossessed by the bank.
The engines, steering and electrics had already been fitted but not the interior, and crucially the bank was keen to get shot of it. Sensing an opportunity, Jimmy snapped it up. He had always been good with his hands and running a furniture manufacturing business meant he had access to most of the tools and materials he’d need to design and build his own interior for it.
It took him the best part of two years to complete but the end result was a comfortable family boat that allowed Jimmy, his wife Karen and two young daughters to enjoy as a family. Initially they kept it in Gillingham marina using it as a base from which to explore the Medway and Thames before deciding to move it permanently up river to Bray Marina.

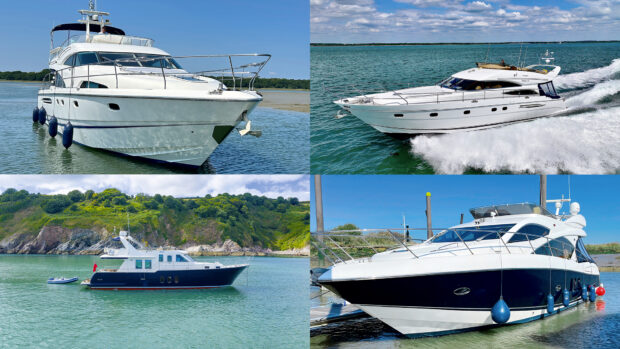
Jimmy’s basis for the new project was a Colvic Sunquest 44. Photo: Alamy
“On the coast we often had to change our plans due to bad weather but on the river we could enjoy a longer season and even if it was too windy to take it out of the marina we could still stay on board and use it as a weekend cottage,” explains Jimmy.
They kept the boat for 19 years but in 2014, with their daughters now in their late teens, the time came to upgrade once again. “Space was tight and the Colvic was getting harder to maintain, if we were going to carry on boating as a family we needed something bigger. It was now or never.”
Buying a brand new 40-footer wasn’t an option but Jimmy was determined to find a replacement with at least two good-sized cabins and all the mod cons they’d need to keep them safe and comfortable for the next 20 years.

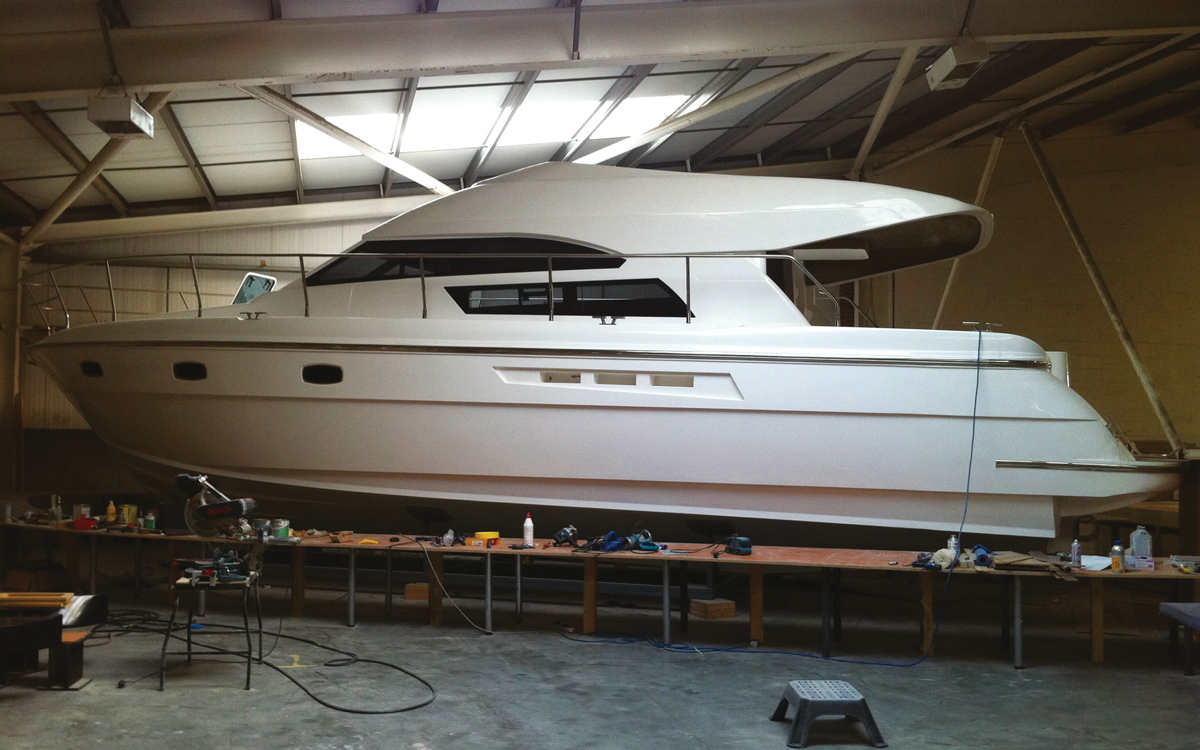
Zenon Yachts adopted most of Jimmy’s design changes and took care of moulding the bare hull, deck and flybridge ready for transport to Jimmy’s furniture factory
As before he searched the secondhand market for something suitable but soon came to the conclusion that nothing quite fitted the bill for his budget. Most of the flybridges he looked at were designed for sunny climes whereas he wanted something that was just as cosy on a cold winter’s day on the Thames.
That meant powerful heating and air-conditioning systems, a high output generator so that they wouldn’t be reliant on shore power, a domestic sized galley with plenty of storage and a practical but stylish interior that would feel like a true home from home. Once again he came to the conclusion that building his own boat might be the only viable solution to the problem.
Moving on up
“I hunted around for a suitable starting point and came across a company called Zenon Yachts building Colvic Sunquest 44 hulls for the Norwegian market. I knew the model had a good reputation for seakeeping as the hull was designed by John Bennett but certain aspects of the styling looked quite dated. I worked out how it could be modernised and discussed my ideas with Zenon Yachts.
From that point on Jimmy took care of the entire fit out, including stainless steel work, glazing, engine installation, plumbing, electrics and fabricating the whole interior
“We agreed to work together to update the design with new portholes, windows and windscreen as well as a new flybridge and folding radar arch. We approached Trend Marine to make the windows, who agreed but only if we bought at least three sets of them. Luckily, Zenon Yachts managed to get two orders for the redesigned boat from Norway and I agreed to buy the third. We templated the existing moulds and made new plugs and tools to fit the revised windows.”
Zenon set to work moulding the new hulls and in 2011 the bare hull and superstructure was delivered to Jimmy’s factory, FabriTec Furniture Ltd, on the back of a lorry where he’d already built a rolling cradle to wheel it inside the workshop. He paid £60,000 for the mouldings but unlike his previous project, the rest of it was completely bare: no engines, no electrics, no sterngear, no plumbing, no interior – just an empty fibreglass shell.
“There were always things that weren’t quite right with our previous boat so I said that if I ever did it again I would build the whole boat from scratch. This was my chance.”
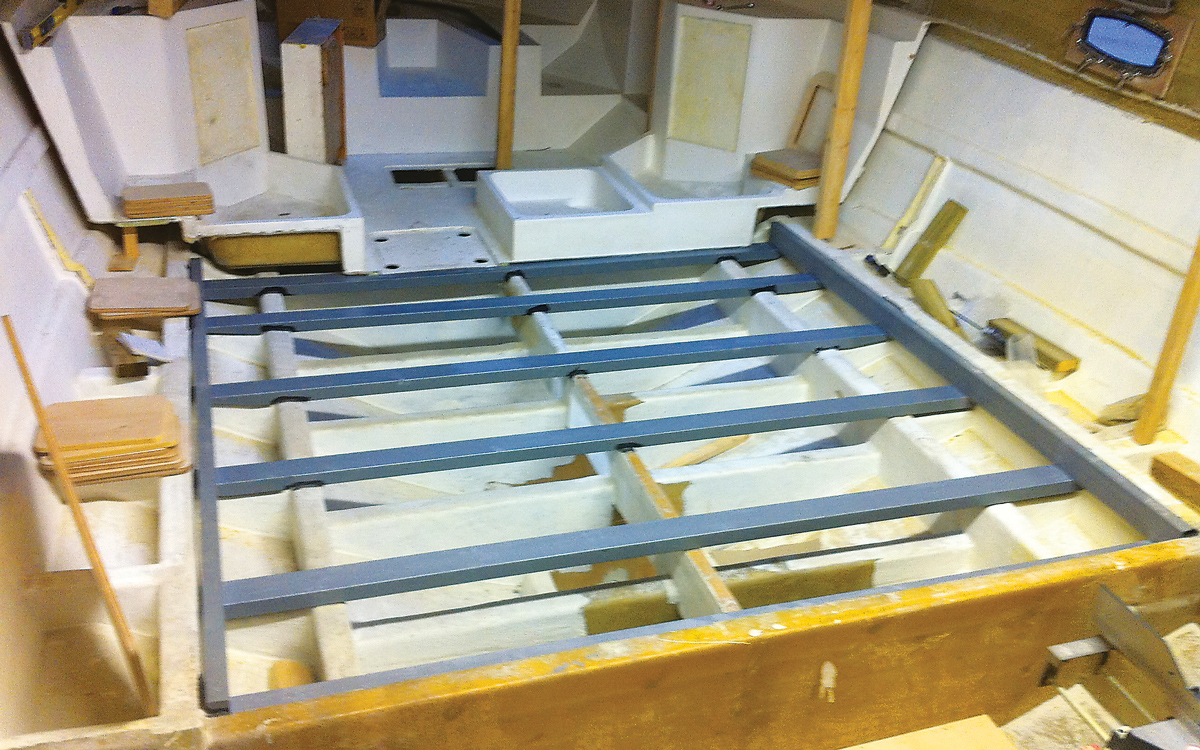
The structural reinforcements for the hull and lower deck start to take shape
His first challenge was to design and fit a set of stainless guardrails and canopy frames but rather than outsource it to a metal fabricator, he bought some steel-bending equipment and taught himself how to shape the tubes to fit his new designs. “Dad always taught me that if someone else can do it so can you – I’ve grown up with that philosophy so learning a new skill doesn’t faze me.”
He did bring in a specialist welder to ensure the joins were neat and strong but that aside, he drew, shaped, assembled and installed a complete set of handrails for his new boat.
With the stainless steel work complete, Jimmy turned his hand to fitting the Trend Marine windows and portholes. Unlike the aluminium-framed windows of the original Colvic Sunquest 44, these were flush-fitting frameless designs that required Jimmy to learn yet another skill in order to fit and seal them correctly.
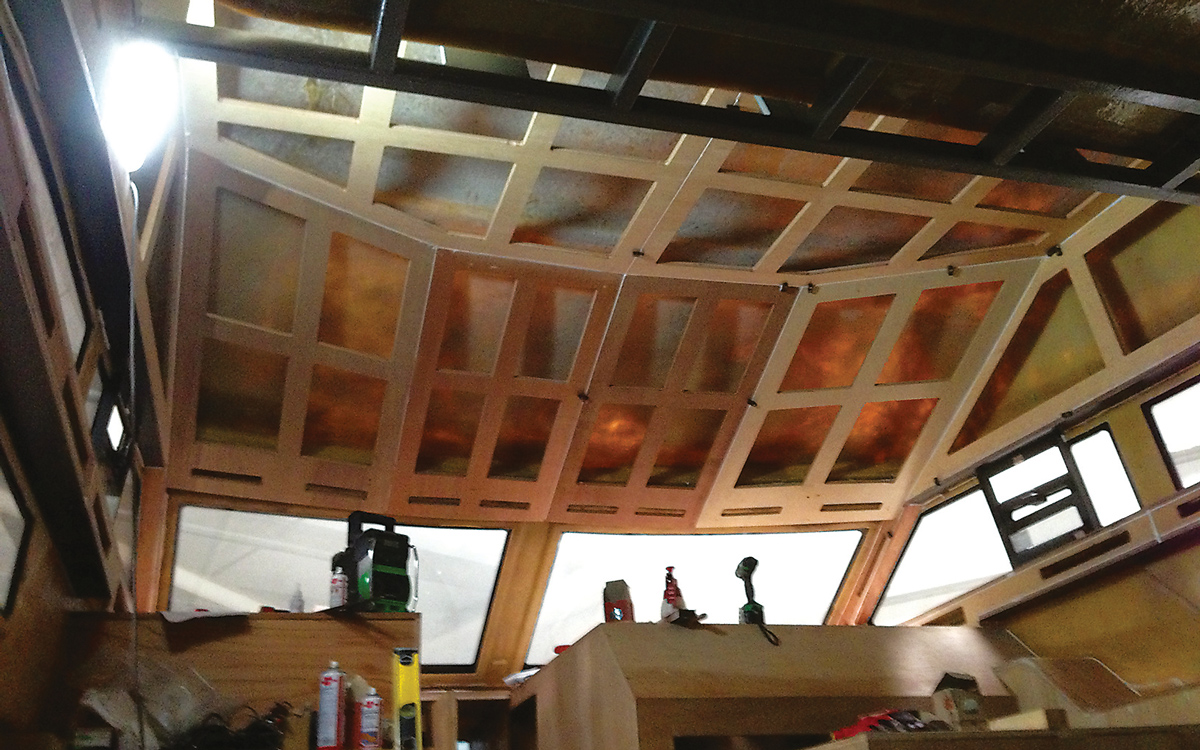
Jimmy built a latticework of frames to support every panel and retain a layer of insulation
Bare necessities
Next on the list were the engines and sterngear. Jimmy was keen to fit Volvos because of the worldwide network of servicing agents and initially looked at fitting a pair of 370hp D6s before settling on the more powerful 435hp variants, which he purchased from Coastal Rides in Dover.
He wanted the simplicity of shafts rather than IPS or sterndrives even though that meant designing and building his own engine bearers and mounts that would precisely align with the shafts and P-brackets. Thankfully his knowledge of CAD (Computer-Aided Design) enabled him to design and triple check all his measurement before committing to anything.
During the course of the build Jimmy reckons he made over 2,500 CAD drawings and spent over 2,500 hours on research and design alone. This, he insists, is the key to both the accuracy and quality of the finished boat, and ultimately saved many more hours and expense than relying on trial and error to get things right.
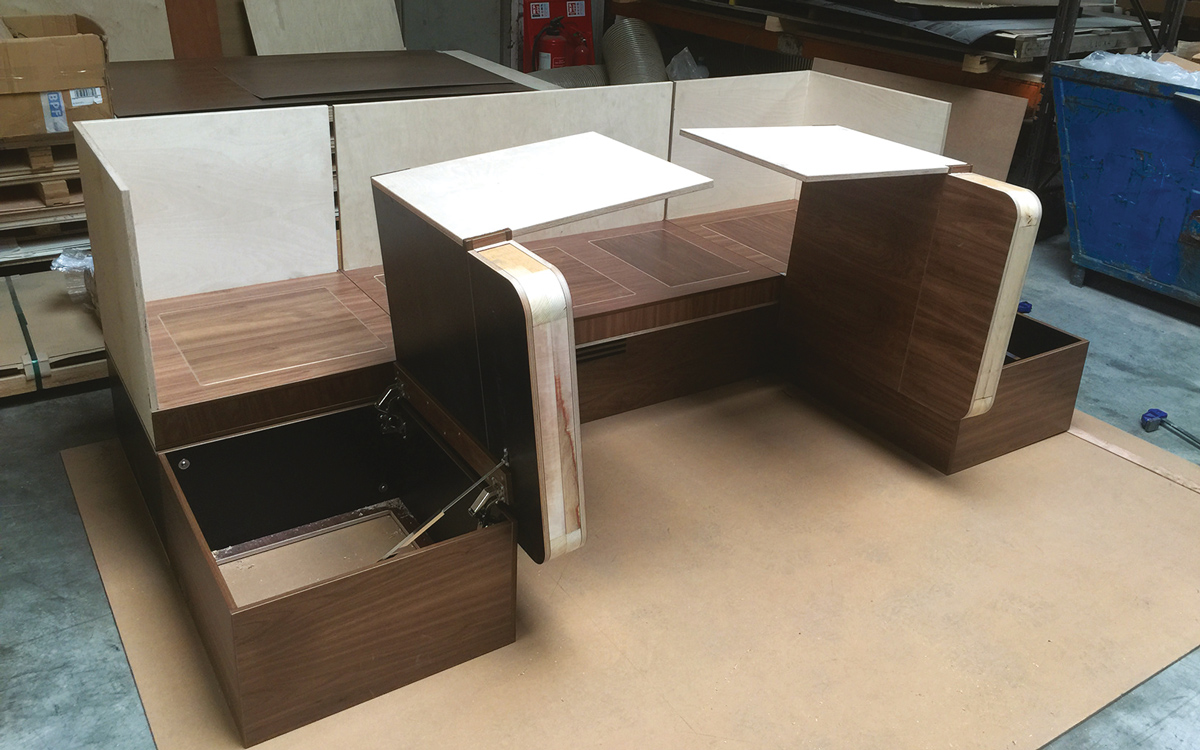
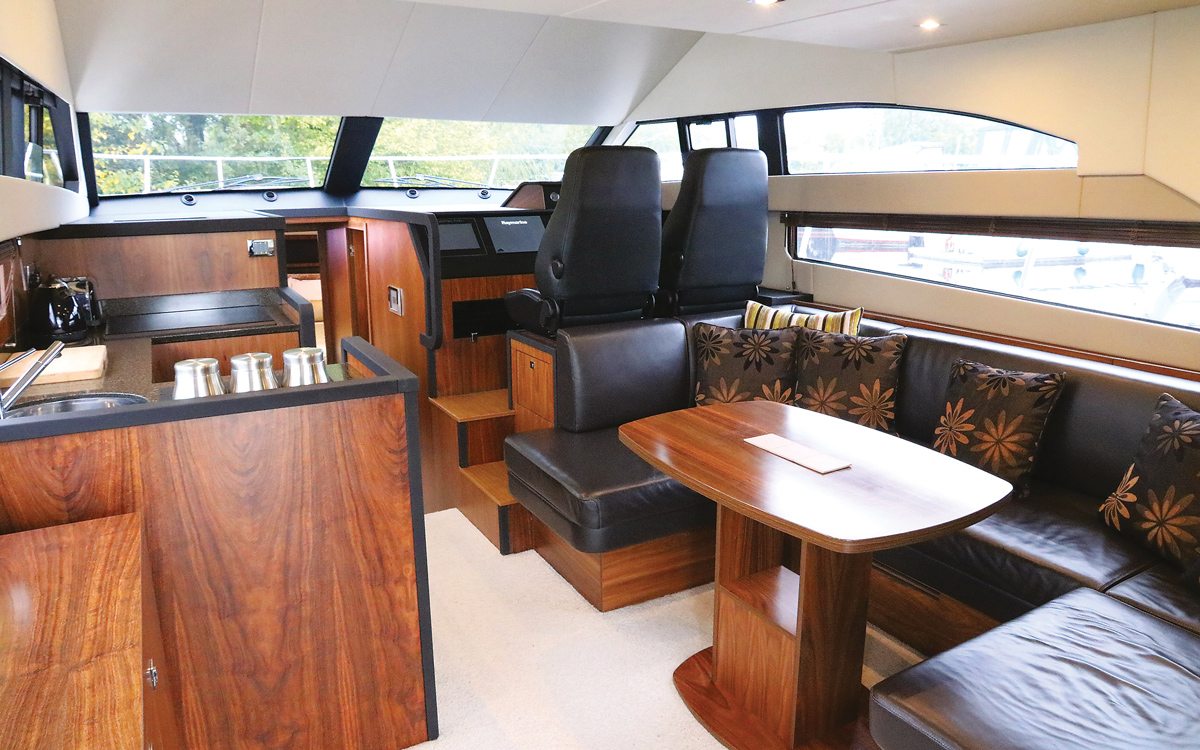
The saloon seating was designed to conceal the heating and air con units
Sure enough, the engines and shafts slotted neatly into place, allowing Jimmy to move on to the interior fit out. In many ways this was the hardest part to crack not just because it’s the part of the build that it is permanently on show but also because it involved sourcing all the right fittings and materials to ensure it looked the part and stood the test of time.
Before starting work on it, he and Karen went to every boat show they could looking for inspiration and ideas to draw on for their new boat, pulling up carpets, opening drawers and checking for suppliers’ names. At times Karen would stand guard by the cockpit while Jimmy rootled away inside, on other occasions they’d simply explain what they were doing and even ask for advice if the designer or builders were on hand.
Cabin fever
With no internal bulkheads fitted, their first job was to design a layout that suited their needs but also created a strong internal framework to support the hull and superstructure – GRP hulls are inherently flexible without one.
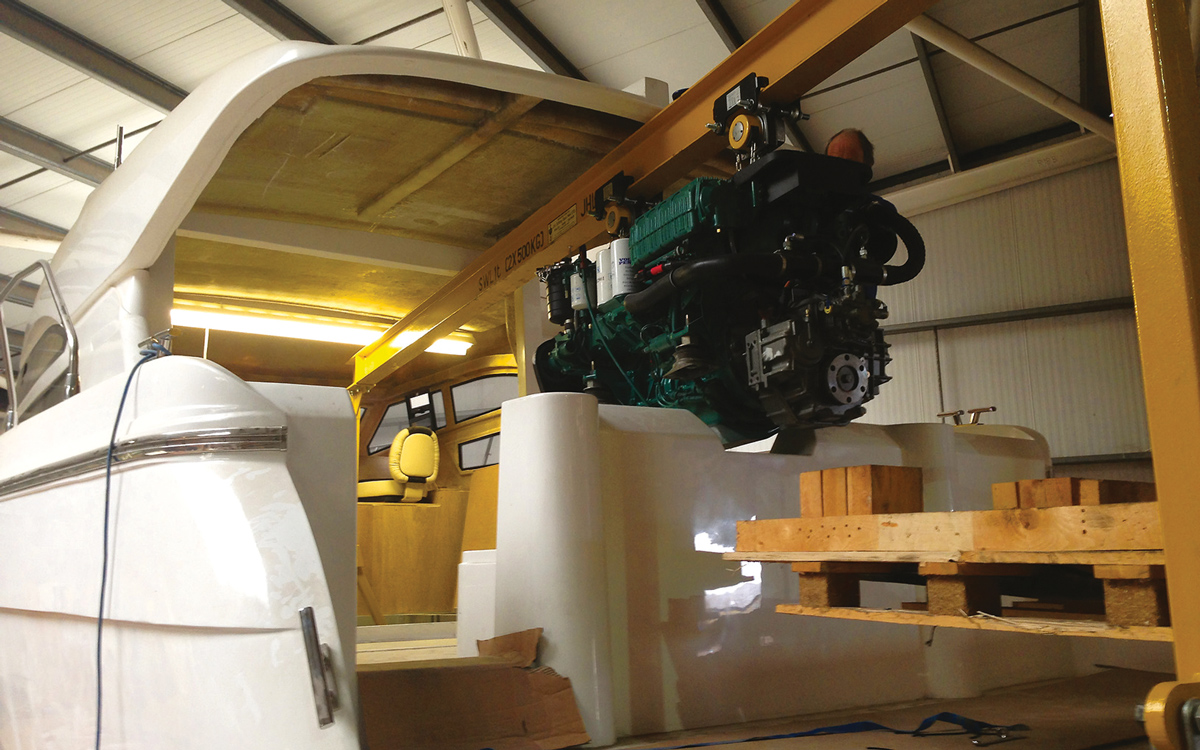
The first of the two big Volvo D6s gets slid along a track and lowered into the engineroom
The original 44s had a galley-down layout with two double cabins but Jimmy and Karen decided to bring the galley up into the saloon and use the space below for a third bunk cabin. With the layout agreed, Jimmy designed and built an entire structural framework of supports, deck beams, bulkheads and paneling with additional insulation to keep it warm in winter. “It’s probably a bit overkill,” admits Jimmy. “But I wanted to be certain it was safe.”
Structure completed, he set to work planning and installing the electrical systems needed to power the boat. The building blocks of this were designed and supplied by Energy Solutions using a 10KVA Fischer Panda generator with six domestic batteries and two for the engine starter motors. Once again, Jimmy himself installed all the cabling and switchboards as well as the LED lighting, bow and stern thrusters.
Next on the list was the galley and saloon. “Karen wanted a four-ring induction hob and an oven as well as a full-sized domestic fridge. They are all made by Bosch and fitted by me.”
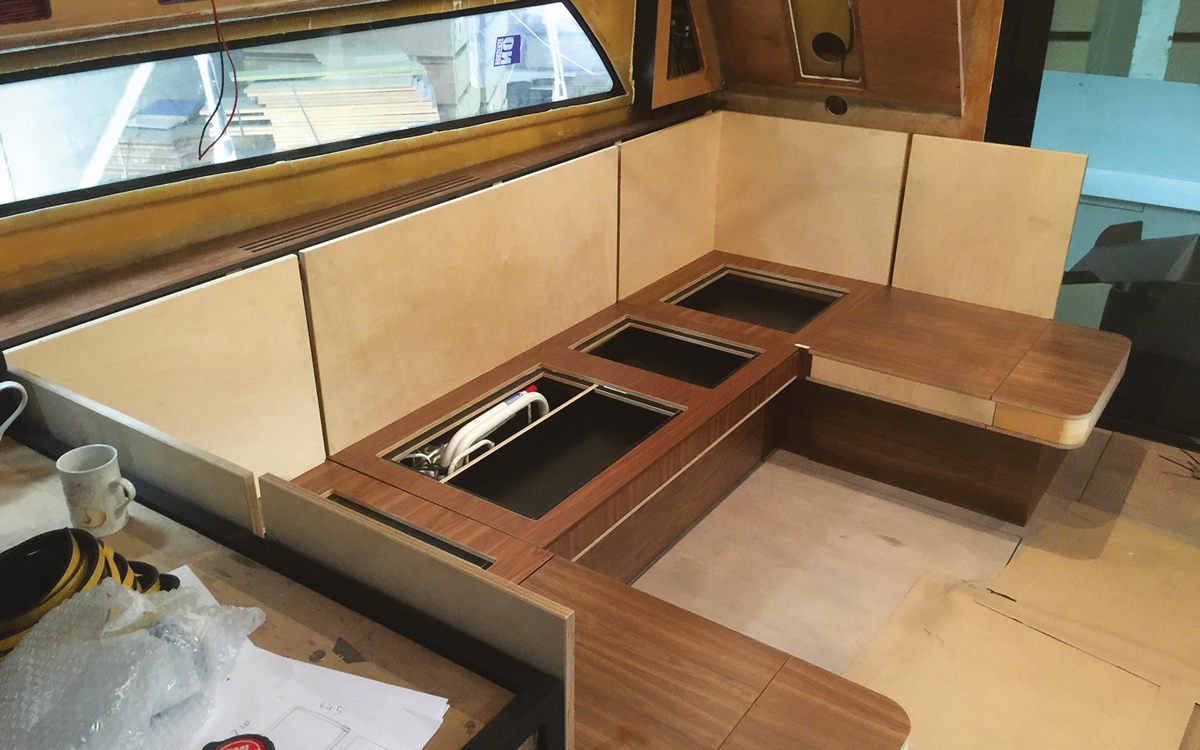
The dinette seating and helm position take shape inside the saloon
However, it isn’t just the equipment that looks the part, the work surfaces are all Corian while the half-height bulwarks that act as both the entrance to the galley and handholds for guests moving forward are topped with rectangular section grab rails covered with a matt effect soft-touch coating.
“I stole that idea from a Fairline Squadron 42,” admits Jimmy. “ I manufactured the railings out of plywood then found the guys who supplied the coating to Fairline and sprayed them with the same stuff.”
The saloon seating, meanwhile, was designed around the Eberspächer air-conditioning system so as to keep it out of view but still easily accessible for maintenance. Hinged bases in the side returns create extra storage and the whole lot was mocked up in cardboard then manufactured in the FabriTec factory before being installed on the boat. Although it uses real wood veneers, they have been overlaid with a melamine finish that won’t fade or wear.

Flying start
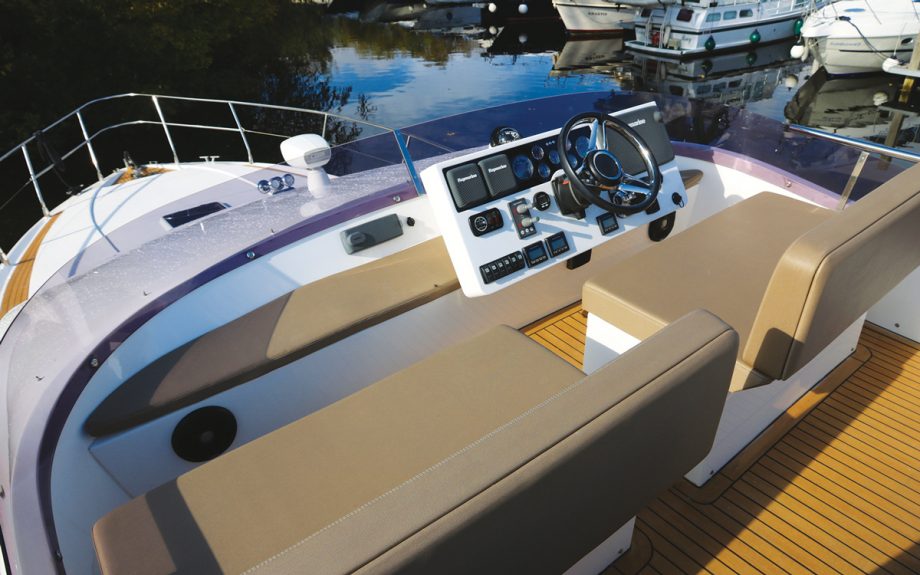
The two helm stations were even more complex to make, involving countless hours of design and templating to ensure the Raymarine navigation equipment all fitted as planned and the ergonomics were correct. There’s even a customised touchscreen boat management system complete with FabriTec branding and a virtual profile of the F44 to control the lighting, tanks, power and diagnostics just like you’d find on a modern Princess.
Karen took care of all the colours schemes, carpets and upholstery choices, which were one of the few things outsourced to Quayside & Leisure in Cannock, Staffordshire. Many of these were inspired by what she’d seen at boat shows and the end result looks just as refined.
If this sounds like a lot of work, it was. It took Jimmy four years and as estimated 5,000 man hours of work to complete the build. Every day as soon as the furniture factory closed for the night, Jimmy would stay on to work on his boat late into the evening.
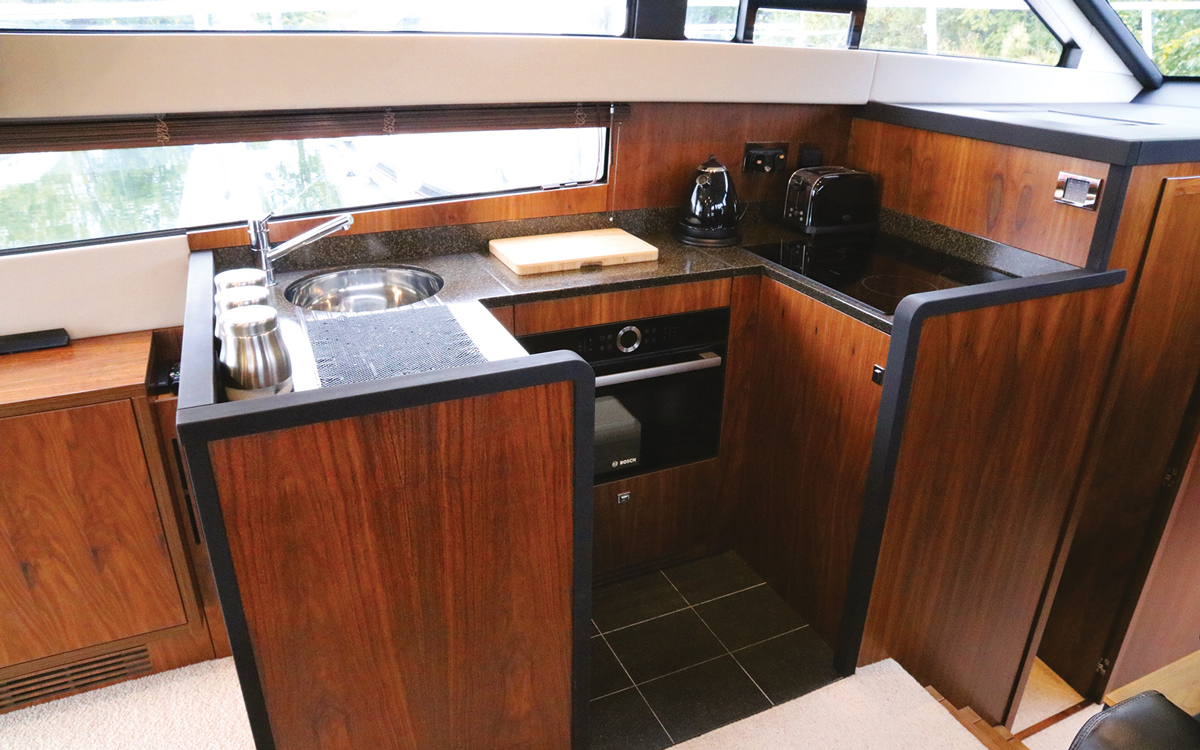
The galley features top quality domestic spec Bosch appliances
“It nearly cost us our marriage,” admits Jimmy only half jokingly. “There were moments when I wanted to chuck it all in and get back to normal life but we stuck with it and it has delivered tenfold what we put into it.”
Nor was it a cheap undertaking. All in it cost them £220,000 to build even without accounting for the thousands of hours of labour that Jimmy put into it. It’s hard to say what it may be worth now but Jimmy did have it formally valued for insurance purposes back in 2015 at £450,000. More importantly from his point of view is that trying to find a new boat with three cabins and all the spec he wanted would have cost him more like £650,000.
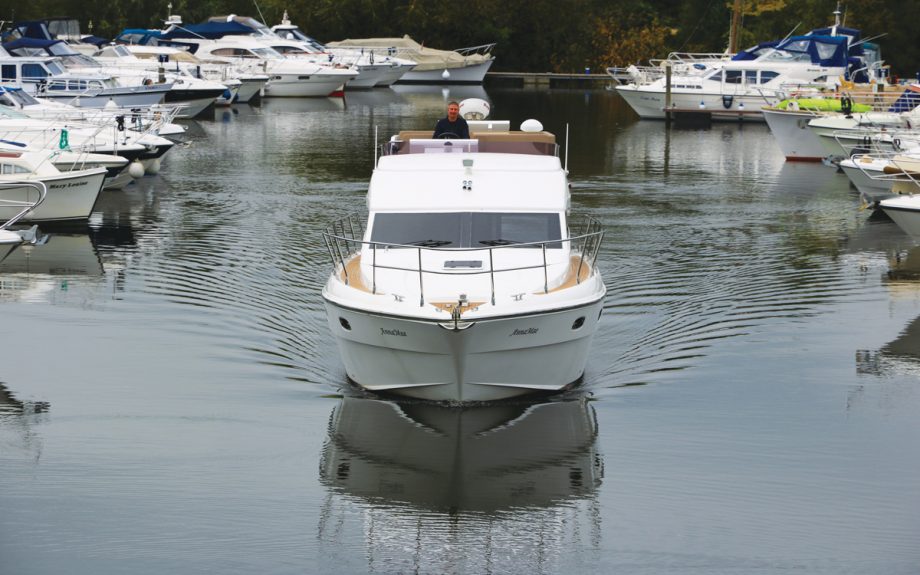
Finally, in 2015 the moment came to launch their new boat. As before they chose Gillingham Marina and waited anxiously for the moment it was lowered into the water and christened Anna Mae after their daughters Ellie Mae and Alix Anna. After a quick check to ensure there were no leaks and two weeks of final commissioning, Jimmy arranged for an approved Volvo agent to accompany him on the formal sea trials needed to validate the engines’ warranty.
Plans include cruises to the Baltic and the Med where its 30-knot speed will come in handy
“After plugging in their computers and asking me to increase the rpm by 500 revs at a time, the boat began to pick up speed. I kept telling them that I needed to slow down as there was a sailing boat close by, but he just told me ‘no keep going, keep going!’ We reached 30 knots flat out and then had to do it all again opening the throttles fully from a standing start to measure the acceleration. We hit 30 knots in 20 seconds. She passed with flying colours.”
Happy ever after
Since that baptism of fire back in 2015, Jimmy and Karen have moved Anna Mae back to the Thames. They spend every other weekend on her over the summer months cruising up to Abingdon or down to the Thames estuary with occasional longer forays along the coast to clear the engines’ throats.
The longer-term goal is to wind down their work commitments gradually and use the time to cruise further afield to Paris, the Baltic and eventually the warmer climes of the Mediterranean. “There is no way we could have afforded a boat like this if we hadn’t built it ourselves,” says Jimmy wistfully. “I still have to pinch myself that it actually belongs to us.”
After four years, 5,000 hours and £220,000, I think they’ve earned the right to call it theirs!
Costs & suppliers
Hull and superstructure mouldings: Zenon Yachts – £50,000
Seating, helm and radar arch: DIY – £6,000
Hand rails: DIY – £3,800
Window & patio door: Trend Marine – £7,000
Electrical system & generator: Energy Solutions – £36,000
Webasto heating & aircon: Keto Ltd – £12,500
Raymarine nav gear: PSI Marine – £12,500
Twin 435hp Volvo D6 engines: Coastalrides – £60,000 (inc. installation)
Seating upholstery: Quayside & Leisure – £8,000
Other materials & fittings: Various – £25,000
Total cost: £220,800
Labour hours
Research, design & CAD drawing: 2,500
Handrails: 120
Windows: 40
Bulkheads & superstructure: 480
Plumbing & heating: 160
Wiring: 800
Furniture & fittings: 500
Radar arch & seating: 250
Engine & sterngear: 150
Total: 5,000 man hours
First published in the April 2020 edition of Motor Boat & Yachting.
Contemporary colours and fabrics were chosen by Jimmy’s wife Karen
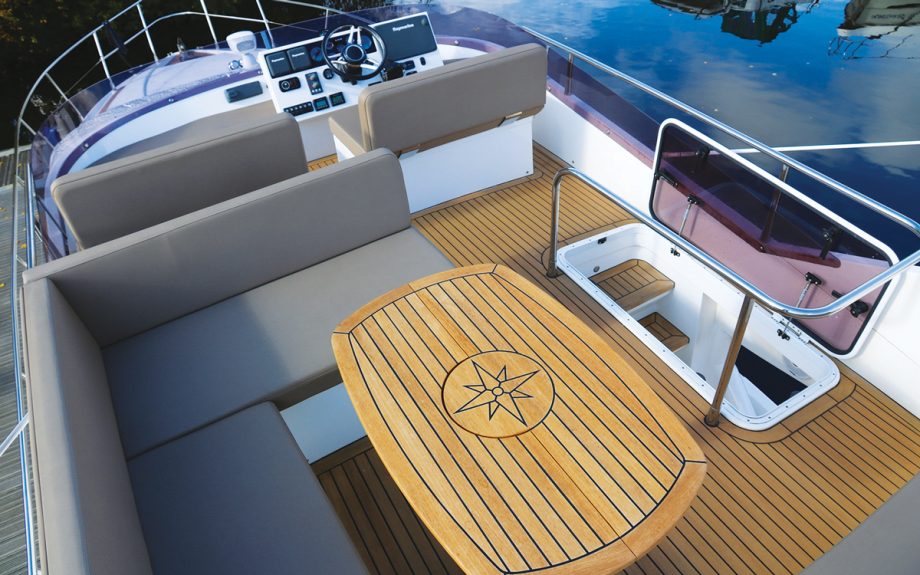
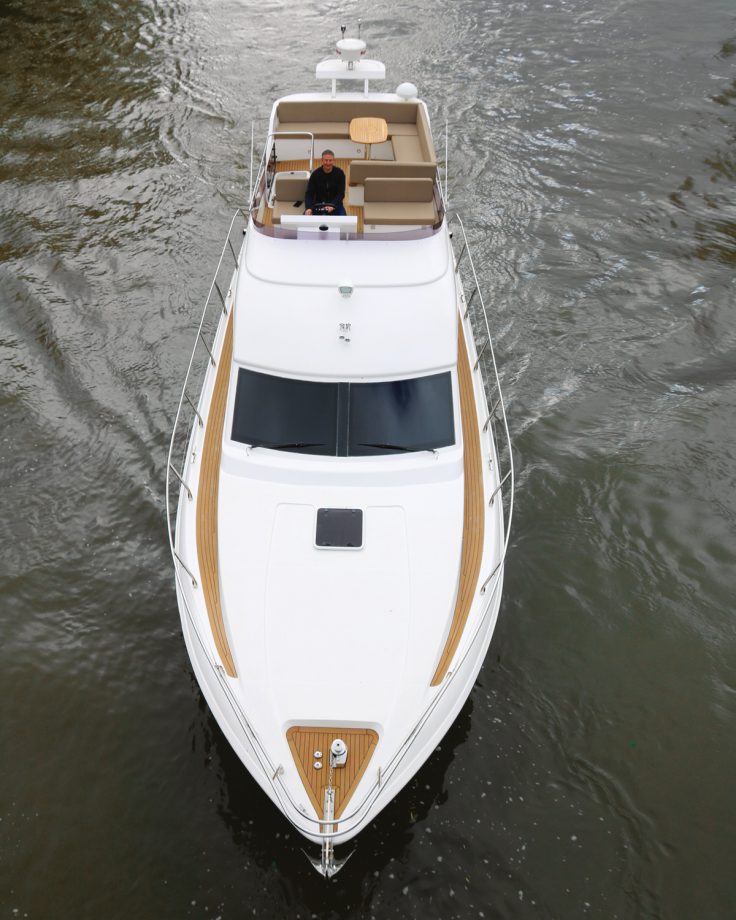
The redesigned flybridge includes a large dinette and a folding radar arch
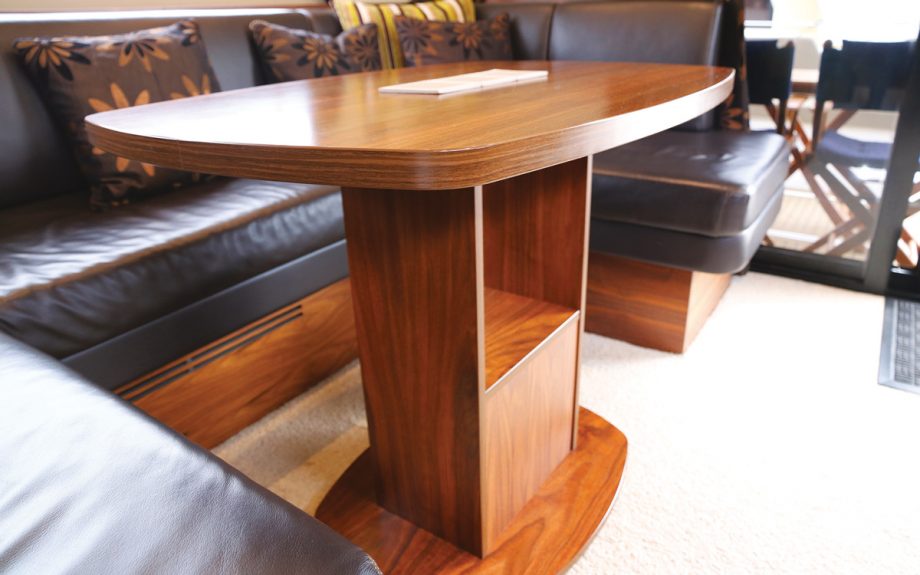
The dinette looks the part but also has valuable extra storage
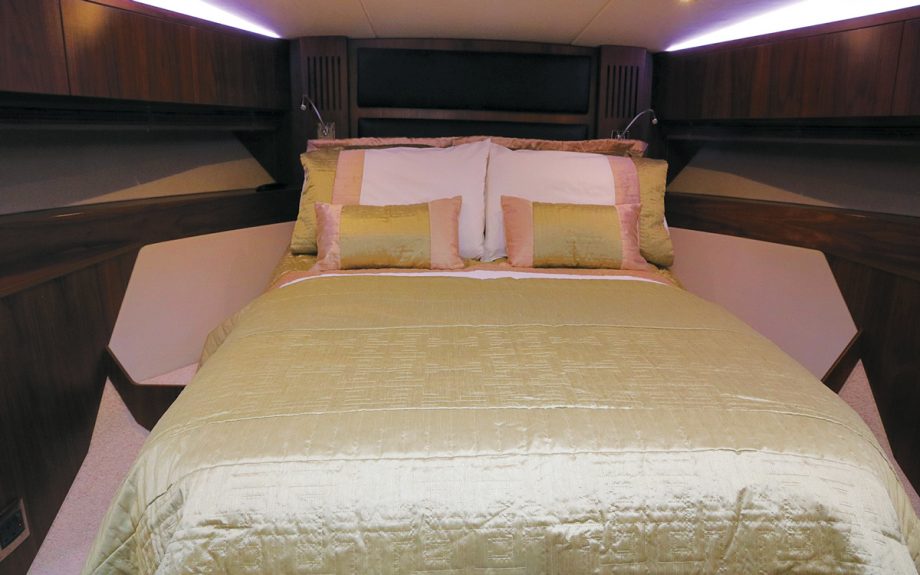
The master cabin in the bows features hidden LED lighting
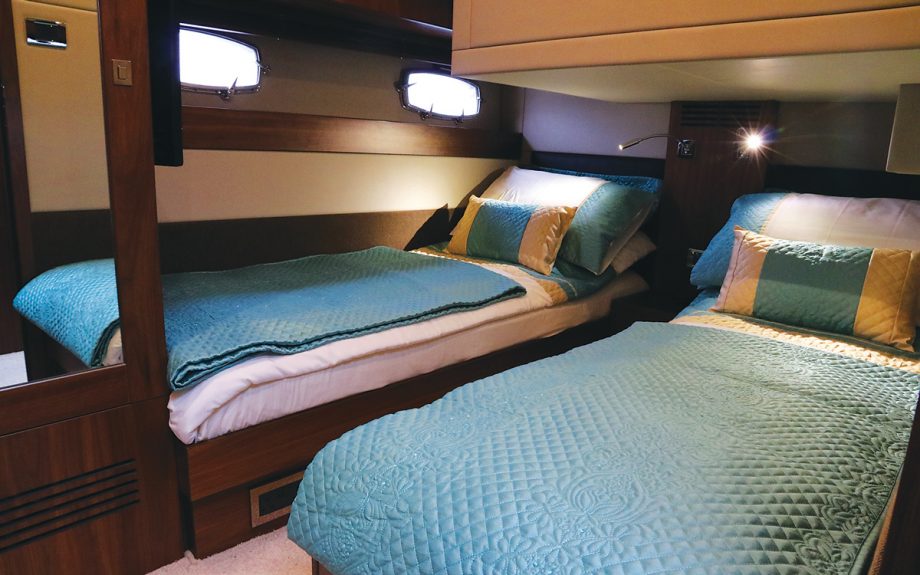
The larger of the two double guest cabins below decks
Many of the fittings are shared with top-end production yachts
Jimmy demonstrates the size of the job list needed to complete the build of his F44
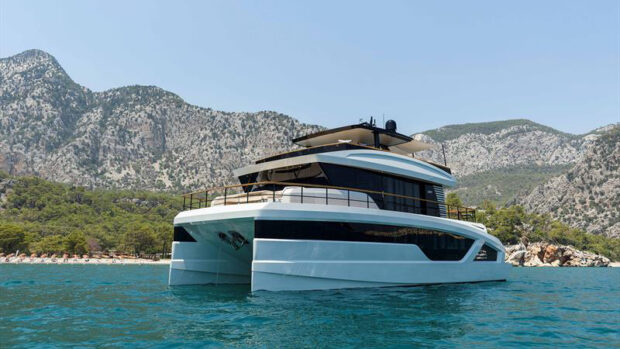
Jimmy’s DIY F44 cuts quite a dash on the Thames
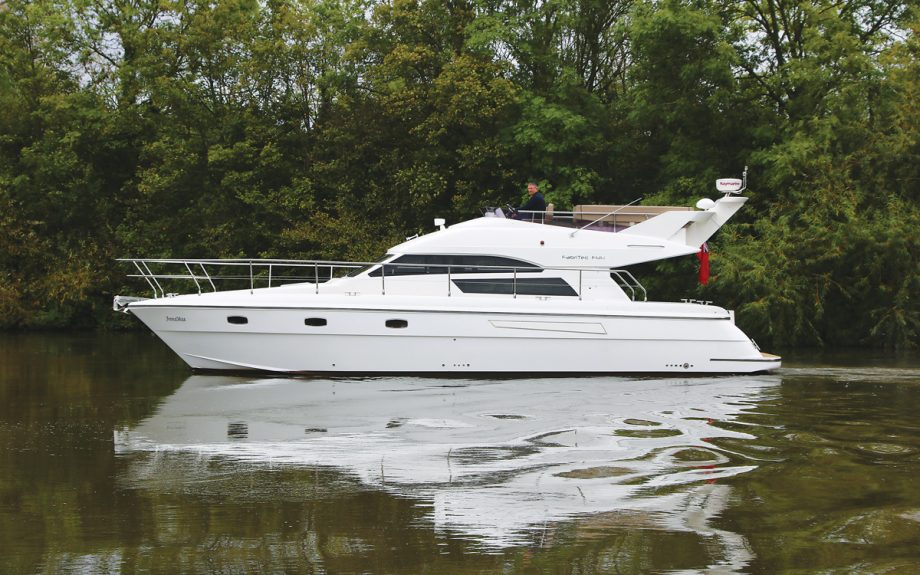
The FabriTec F44 uses the same John Bennet hull as the Colvic Sunquest 44, but clever mould plugs, modern flush-fitting glazing and a new flybridge design with a folding radar arch have transformed its appearance