

Our resident boat instructor Jon Mendez explains how to replace your diesel-engined boat's fuel filters.
All diesel-engined boats have a set of fuel filters for each engine. They remove any contaminants from the fuel system and keep your engine running sweetly, but even one fill-up of poor fuel or a gradual accumulation of dirt and water over time is enough to clog up your filters.
The good news is it’s relatively simple to change the filters and there’s every chance you’ll need to one day, possibly whilst at sea, so it’s worth having a practice in less- challenging conditions first.
Most fuel systems have a coarse filter – to remove water and larger particles or dirt somewhere in the fuel line – followed by a fine filter, usually on the engine.
Article continues below…

VIDEO: How to change an impeller
In the second part of our practical videos series, Jon Mendez explains how to change an impeller
VIDEO: How to… Prevent diesel bug
No owner wants plans to be cut short by diesel bug, Jon Mendez's video goes through how to prevent dreaded
Fuel problems often show up as surging, with engine revs rising and falling, or hesitancy when you apply more throttle. If you experience this, first check for any water in the coarse fuel filter.
This is usually done by undoing a small tap or screw at the base of the filter and draining off whatever has settled there. If only a small amount of water and contaminant comes out and it doesn’t solve the surging then a change of the filter element itself may be needed. To change the filters, first locate the fuel cut-off and close it.
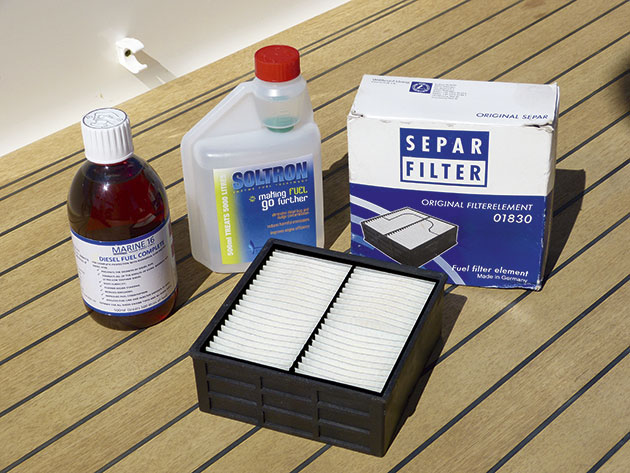
You will need a filter wrench for canister-style filters or possibly spanners for other types, clean cloths, new filters, diesel-proof gloves, a container for the old filter and excess diesel. Depending on the type of filter, you will either have to change the whole cartridge or the element inside it. The latter requires you to remove the top, carefully pull out the element and replace it with a new one, along with the rubber seals, then reassemble it.
Opening any filter introduces air into the system, which needs to be bled out before the engine will run again. To do this you need to find the fuel pump and its primer. Follow the fuel lines and usually where they join the engine you will find the fuel pump and the primer. A primer is just a manual way to pump fuel. It can be a lever, a push button or even a wheeled knob that you unscrew and pull out like a mini bicycle pump. Once you have located this, keep following the fuel line until you find a second filter.
This is the fine filter and is usually a replaceable canister. On the top of the filter housing you will find a bleed point. This is likely to have been done many times before so will usually be the nut with the paint missing. Undo this about a quarter of a turn then pump the primer until all the air has been expelled and clean fuel spurts out of the bleed screw.
As soon as you get a steady stream of fuel, close it off. Cartridge-style filters are likely to need a lot more pumping than top-loading element ones, as the new cartridge will be completely empty of fuel. That’s the coarse filter changed and bled, so in theory the engine will now restart.
However, if problems persist then you may need to change the fine filter. This is usually a replaceable canister-style filter just below the bleed point you found earlier. Some fine filters have a water-in-fuel sensor on the base that you’ll need to unplug first.
Now you can undo the cartridge using a filter wrench and screw in a new one. Don’t forget to replace any sensors. Finally, bleed the air as before but pumping for longer in order to fill the new cartridge with fuel. Carry spare fuel filters of both types on your boat.
Our How To video series is brought to you in association with GJW Direct.