

When tying up any boat, small or large, it has to achieve the basic aim of securing it safely and making sure it will still be there when you return.
A wander around any marina will show a multitude of different ways of doing this, some neat and sensible, some less so!
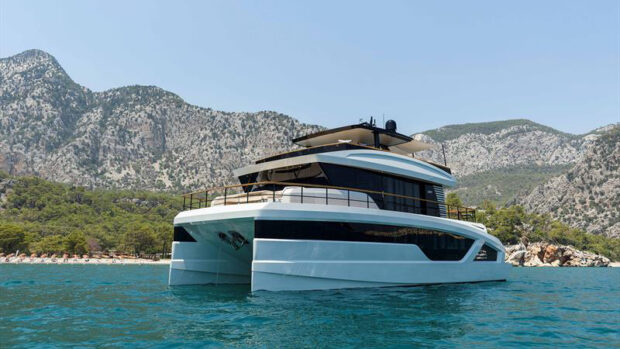
Larger boats bring extra concerns when moving up from smaller craft. The 60ft (18m) flybridge motoryacht used for this demonstration weighs around 25 tonnes. That displacement together with the windage means that all the dock lines and fenders also have to be larger in size and weight.
Owners of craft up to 40ft generally use two lines to secure their boat, making sure the bow and stern lines are long enough to double up as springs. By the time your boat reaches 60ft I would recommend using at least four individual lines because it reduces the weight of each line and makes any adjustments simpler.
All berthing manoeuvres require the skipper to decide which line goes on first, where it is going to go and whether the crew steps ashore with it or lassoes a cleat from on board, followed by the next line and so on.
Always double check that you have made your plan explicitly clear to the crew. On larger craft the height of the bow and the weight of the lines makes any form of lassoing from the bow pretty much a non-starter so that generally means that the first line ashore will be a stern line.
Article continues below…

How to dock a boat: Three simple methods for single shaftdrive boats explained

How to tie 4 essential boating knots and when to use them
This can be set up either as a short lasso or a working end that the crew will step ashore with when called upon by the skipper. Prepping the lines so you are ready before you arrive is key.
I like to do this by walking the bow line forward from the aft cockpit, with either a tied bowline or a spliced loop in hand, passing this over the top rail and onto the bow cleat from the outside to ensure it doesn’t end up fouling the rails, then walking back towards the cockpit, making sure the line is lying neatly along the side deck.
I then place the loose end onto the rail ready to be grasped by whoever steps ashore. Next I prepare the stern line so it is ready to be used either as a short lasso or an open end you can step ashore with.
Once I have manoeuvred the boat into position and am certain it’s stationary, I will, if alone, leave the helm, walk to the stern and lasso the stern line, making it fast before stepping ashore and walking forward to pick up the bow line.
As soon as these first two lines are secure, add an aft spring to stop the boat moving aft and a fore spring to stop it moving forward. Leaving some slack in the bow and stern lines allows for limited movement but try to keep the spring lines as long and taut as possible.
The size and positioning of cleats on many larger boats are often geared around Med-based berths where the craft all lie stern-to the dock. This often means that they are not best placed for an alongside berth.
This can make it hard to use a long enough line for the stern without presenting a trip hazard. I combat this by using a cross line from an offside aft cleat to a shoreside point well behind the boat. If expecting winds or a longer stay, reverse all the lines by taking the loop ends onto the dock so all the loose ends can be stowed on the boat.
Also double up the bow line, using a second securing point, and add a cross line on the stern. Lastly, do your best to avoid short lines; in windy weather they will snatch and cause damage. If short lines are unavoidable use rubber snubbers to give a degree of stretch.
If you enjoyed this…
Be first to all the latest boats, gadgets, cruising ideas, buying advice and readers’ adventures with a subscription to Motor Boat & Yachting. Available in both print and digital formats, our monthly magazine will be sent directly to your home or device at a substantial discount to the usual cover price. See our latest offers and save at least 30% off the cover price.